They say that the first step to solving a problem is to admit you have one. Okay, I’ll admit it. I can’t stand to leave my camera behind when I venture into the outdoors. I’ve tried many times but I can’t avoid the unassailable conviction that the first time I leave my camera behind I will be presented with photographic opportunities of unparalleled beauty. Accepting the inevitable, I began trying to find out all the ways how to carry a DSLR camera hiking, snowshoeing and generally being out and about.
How to Carry a DSLR Camera Hiking
Here are the ways that I’ve tried with some commentary on how they worked for me. Everyone is different so your mileage may vary. Keep in mind that as a avid photographer I sometimes carry a fair bit of photography equipment with me (Canon 7D, 24-105, 70-200, 10-22, 100mm macro, tripod).
Backpack
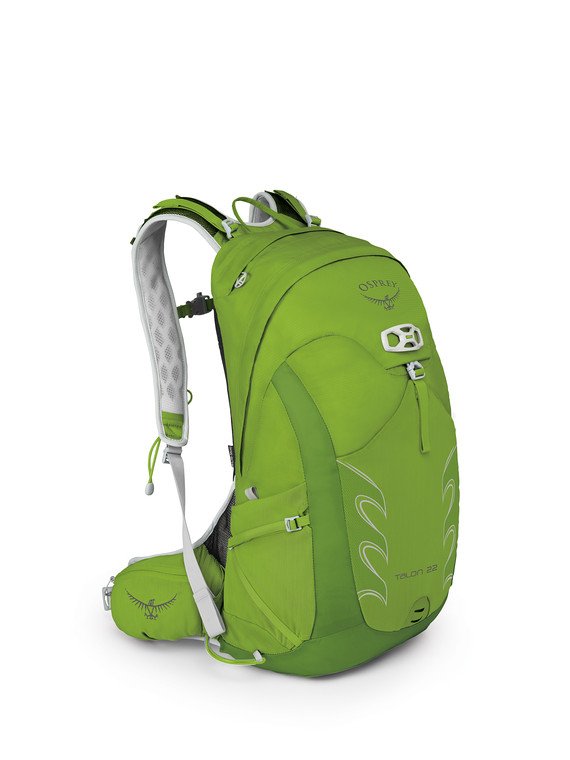
Osprey Talon 22 Backpack
One of the easiest and cheapest ways to carry a DSLR camera hiking is to just put it in your backpack. I found a number of shortcomings to this though, the biggest being that your camera is not available for use unless you stop, remove your backpack and dig through it. That gets old really quickly and if you want candid shots of wildlife or your hiking companions it will be too late by the time you dig your camera out. I found that I got sick of doing this and would just skip taking many shots. Another hazard to this method is that your camera can bang and rub on other hard objects in your pack as you move. I now only use this method if it’s raining very hard and I won’t be taking photos anyway.
The Osprey Talon 22 can be used with this method.
Regular Camera Neck Strap
Carry a DSLR camera hiking with a Canon Camera Strap
Most cameras come with a strap meant to be worn around your neck with the camera hanging down on your chest. I found this worked poorly for me since the strap chafed my neck, allowed the camera to swing dangerously close to rocks and other objects when bending down and flapped in the wind causing vibrations when I had the camera on a tripod. I now have a growing collection of brand new neck straps collecting dust so that should tell how much I like this method.
Amazon has regular Canon camera straps.
BlackRapid R-Strap
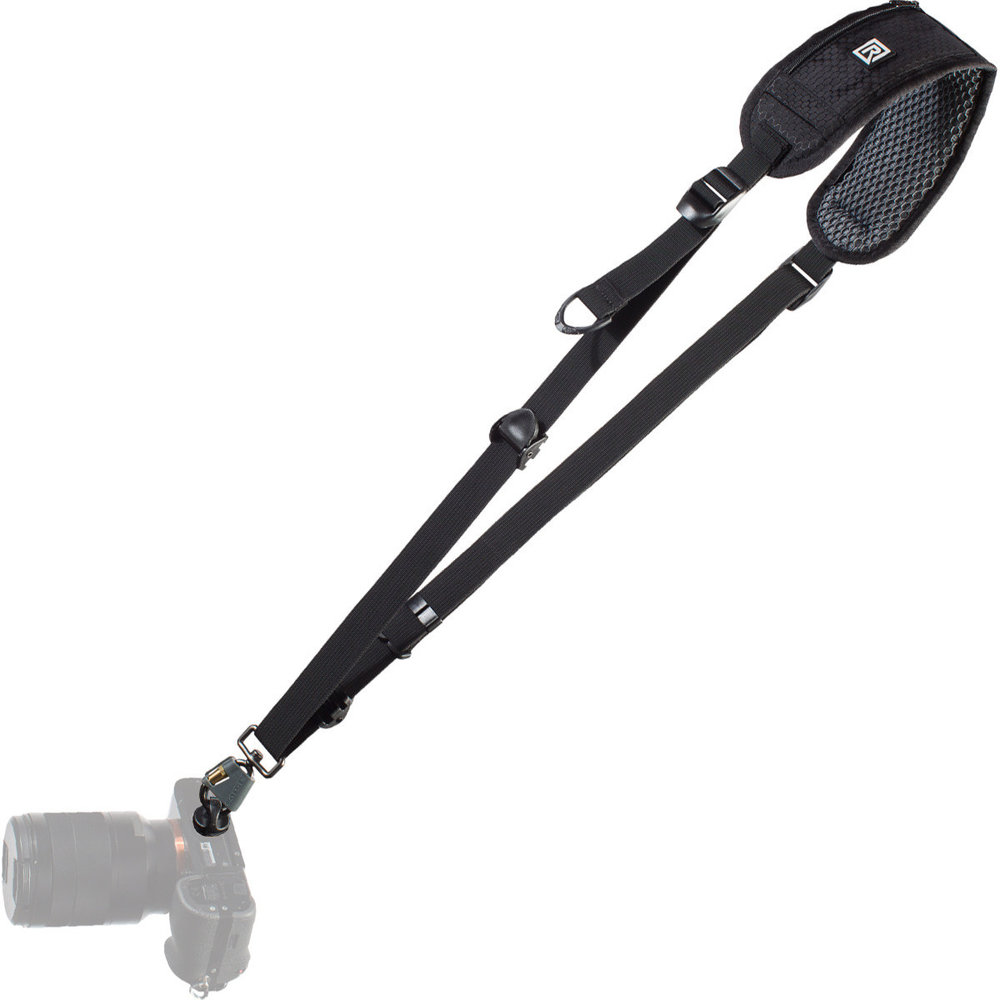
Carry a DSLR camera hiking with a Black Rapid Classic Retro Camera Strap
This is a simple strap worn diagonally across your torso. Your camera dangles from this strap using a swivel fitting screwed into your camera’s tripod screw. A DIY variation of this can be made with some nylon web strap and a carabiner. For some light outings where I’m doing more shooting than hiking (e.g. shooting a rugby game or walking around town) I really like this method. It’s unobtrusive yet leaves your camera immediately available and you don’t look a total photo dork if you’re just walking around the local sports field. For any kind of more serious walking, however, it leaves your camera able to swing around way too much to be of much value on a hike.
The RS4 on Amazon
Toploader
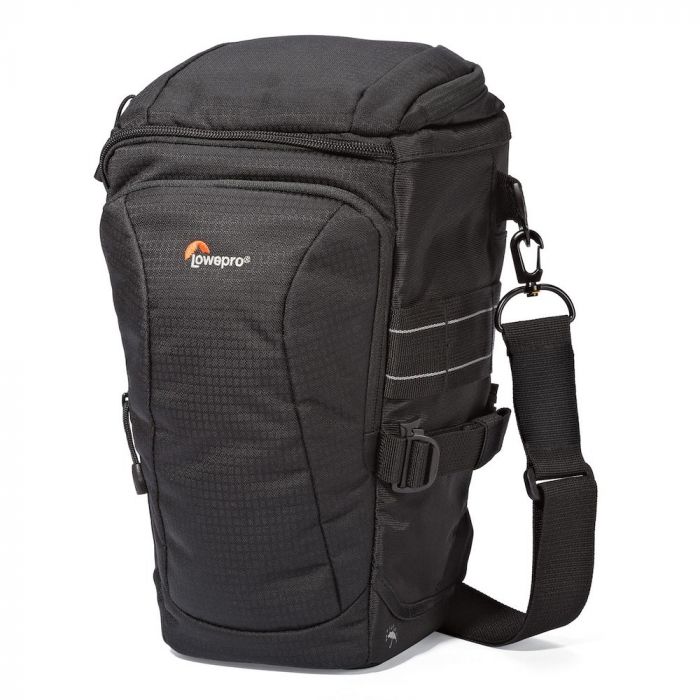
Carry a DSLR camera hiking with a Lowepro Toploader Pro
A Toploader is a small camera pouch worn on your chest (e.g. Lowepro Toploader). It attaches via a lightweight harness you wear over your shoulders (like a backpack in reverse). Toploaders offer an excellent way to keep your camera ready for use but safe from bumps, bruises and the elements. The straps don’t interfere with backpack straps so they can be worn together. Toploader are available in a variety of sizes depending on how long a lens you travel with. I used a Toploader for several years and was very happy with it. My only gripes were that it impaired your vision a little when going downhill and that you still had the bulk on your chest even when you had the camera out shooting.
The Lowepro Toploader on Lowepro.com
The Lowepro Toploader on Amazon
Cotton Carrier
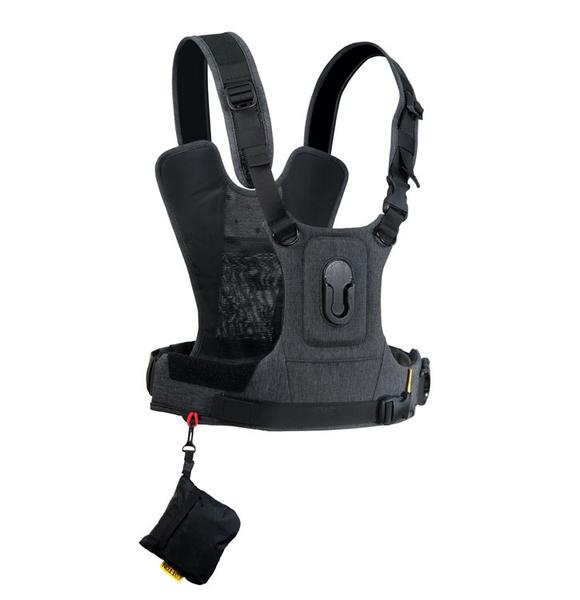
Carry a DSLR camera hiking with a Cotton Carrier G3 Camera Harness
I tried the Cotton Carrier and was instantly sold. This system consists of a lightweight chest plate with over-the-shoulder straps similar to a Toploader and a small slotted hub you screw into your camera’s tripod screw. To fit the camera onto the chest plate you turn your camera so it faces 90 degrees to left or right, slide the hub into a matching slot on the chest plate and then let the camera hang with the lens facing down. The hub is constructed in such a way that the camera is securely locked into the plate when facing down but is free to slide out when the camera faces to the side. I have run downhill on snowshoes and the camera stayed firmly locked in place and yet I could have it out and shooting in less than 1 second. My hiking companions have started calling me ‘quick draw’. For even more security (perhaps when mountain biking or downhill skiing) there is a Lens Stabilization Strap which can be fitted over the lens and a camera tether available. I’ve never felt the need to use either. The Cotton Carrier is now my preferred way of carrying a camera. When I need protection from the weather I use rain sleeves from the same manufacturer. These work well in light rain. In heavier weather I’m unlikely to be taking photos anyway so I just put the camera in my backpack.
The G3 Camera Harness on CottonCarrier.com
The G3 Camera Harness on Amazon
There are no doubt other ways to carry your camera but these are the ones I’ve tried so far. If you have other ways which work well for you I’d love to hear about them. I have no affiliation with any of the products listed here.
Originally posted April 2011. Updated July 2020.
Nice writeup!As someone who does a fair bit of outdoor adventures with a DSLR I thought I would share my comments.Having the camera on your chest is by far the easiest way to quickly access your camera. I am not familiar with the Cotton Carrier (looks very interesting, I’d love to take a look at one sometime). I have a custom (home made) chest pack. It was designed around my camera (D700) with an 80-200 2.8 lens on it. It has very low profile (a problem that I dislike about the store bought chest/toploader bags) as well as extra material at the top with a drawstring to keep out the snow/dirt/moisture). I also use the Lowe Pro Lens cases clipped onto the sides of the bag if I want to carry an extra lens or two.This setup is great for hiking and skiing.For Kayaking I use a Drybag with a waterproof zipper (same type of zipper found on dry suits) and is completely air and water tight and submersible (when closed properly. Its from a company called sagebrush dry http://www.sagebrushdrygoods.com/ I just keep it between my legs in my boat for easy access.For biking or when I need to carry lots of gear a backpack is the only way to go… I have accumulated a fairly large collection of packs over the years but have a couple camera specific favorites that I use the most. They have access though the back of the pack (the part that sits on your back when you are wearing it) I like this feature because I can quickly take my pack off, rest it in the snow/dirt/wherever… access the gear in a padded organized compartment, shoot, put the gear back, and put the pack back on without getting the snow/dirt on my back. Also if I forget to properly zip my bag up (it happens more than I would like to admit) I don’t have to worry about gear falling out behind me! I use a couple different sizes from Lowe Pro’s Flipside series as well as a pack from F-Stop http://fstopgear.com/ which is well designed for skiing.The F-Stop pack has a removable padded camera compartment which is easily customizable with velcro dividers. The lowpro Flipside packs are completely padded and customizable (no removable compartments). Dakine also makes a decent looking rear access pack, I have not tried it.Another advantage of a padded camera pack is if you happen to take a fall (it happens!) your gear is well protected and will usually survive the impact. If you just drop you camera in your regular backpack make sure you wrap some clothing or something padded around it and any extra lenses/flashes/parts…Happy shooting!
Thanks for the great comments Dave. I have also used a variety of photo backpacks. I used (and still use occasionally) a Lowepro Slingshot. I find it great for quick access to my camera around town but the one shoulder sling starts to be uncomfortable after an hour or so. Not suitable for hiking. I have also tried a Kata 3n1. While the Kata makes a pretty good airline carry on for traveling with all my gear plus items needed for flights, its a terrible backpack.I use Osprey hiking backpacks when I’m out hiking or snowshoeing. I love these packs. They are very comfortable and work great. To carry any extra lenses I bought or made individual cases to store my lenses in when in my pack. I found that most dedicated photo backpacks had poor suspension systems. I’ve seen the fstopgear bags advertised and they look much better.
[…] 5 Ways to Carry a DSLR Camera on Outdoor Adventures […]
[…] […]
Thank you for these tips. I’m about to go to a hike tomorrow and was able to stumble upon this. Thanks!
@ PBX Nice! Let us know how it goes.
[…] On the other hand, if you’re looking for chest mount options or better mounts for larger cameras, check out the Cotton Carrier 1 Camera Vest and the other options in 5 ways to carry a DSLR camera on outdoor adventures. […]
Have you ever heard of “peakdesign”? They make a great looking alternative to the cotton carrier product called “capture clip”.
Haven’t heard of that one yet. I’ll check that out. Always nice to see other alternatives for different situations.
I currently use the rapid release version of Upstrap camera strap. It disconnects at the bottom end near the camera to remove the strap but leaves the part attached to the camera (about six inches on each side). I also bought the Upstrap backpack attachments. This is two separate straps that have the same attachment as the camera strap. You hook one to the D-rings on each of your regular backpack straps. Then the camera strap ends click right into these just like they would the regular camera strap. (See Photo). These straps stay on my backpack at all times. I never take them off. Since the camera is connected to each backpack strap it does not have much swing to it like a normal camera strap worn around the neck. The straps are much shorter plus the length is adjustable so it can be down around your belt if you wish or way up close to your chest. The only problems I have are that the camera lcd and viewfinder sit flat against your belly with the lens pointing directly forward. If you sweat much it can make a mess of your camera, plus the sweat from your face drips right onto the camera too. Also causes the lcd and/or viewfinder to fog up in certain weather from the heat of your body. It does impair your view a little when hiking downhill. You have to kind of look to the side of the camera if you want to see where to step down. Not a big deal though. The worst part is that the camera is constantly exposed to the dirt and dust of the trail. I have to clean my camera sensor pretty regularly. I suppose several of these negatives would also be true about the cotton carrier too.
Thank you so muchfor this post. It was a very straightforward explanation on what I can do nowto have better photos. I just got a dslr so I am very excited to use thesetips.http://www.cam-bag.com/Military-Ops.php
f-stop gear bags should be considered here for sure. Check it out at http://www.fstopgear.com. New line is killer.
I’ve always had a passion for creating things. I like to make little experiments where I design something to see if it can produce enjoyment for someone using it. The results of these experiments are in this store. The first exclusively Quabblejack product was the camera strap. The very first one that we produced (and it is still on my Canon Ex1 Program Film Camera), was produced from a vintage Pendleton Flannel Shirt that was too small and damaged. I loved the idea of finding another way to enjoy this fabric, while replacing my generic camera strap.http://www.quabblejack.com/
HI. Thank you for all the comments. I did take a look at the black rapid strap, but i cannot decide on the website which one i should get. I use a D800 and walking around with it can be trying. Any suggestions ? help ? does the lens hanging cause any damage ?
Is the Cotton Carrier compatible with wearing a daypack?Thanks :)!
Hey Scott! You can definitely wear it underneath a daypack. The mesh on the back is very thin but does add a bit of a layer in between. The webbing straps on a toploader will be a slightly slimmer if it’s a concern. The Cotton Carrier is a little more convenient for the camera on the front though.
Thanks so much for your helpful response, Ross :)!!